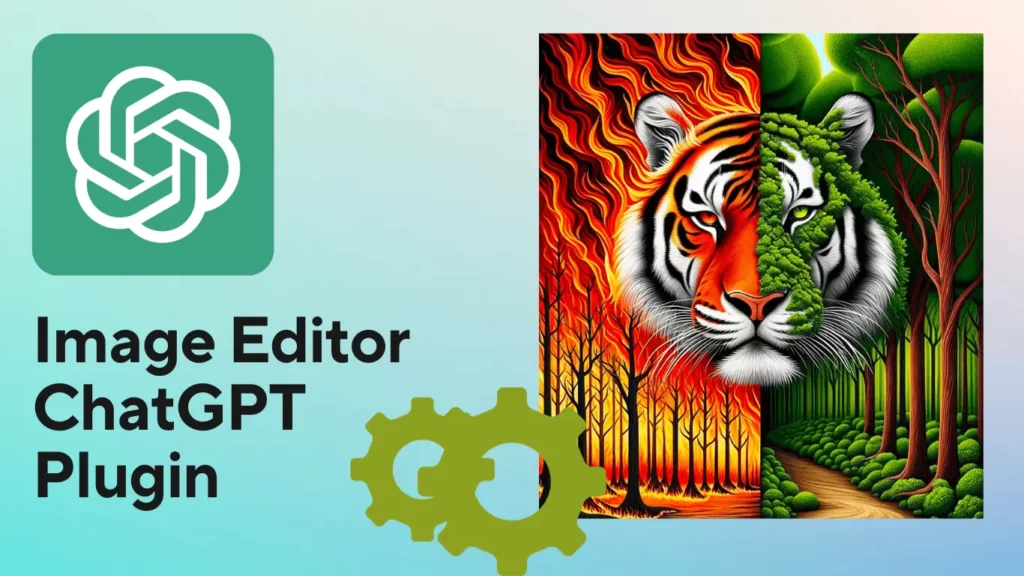
Are you excited to know about the image editor ChatGPT plugin? Experience the enchantment of image editing through the synergy of OpenAI’s ChatGPT and the great Image Editor plugin. Here, You’ll explore the great features of editing images using the intelligence of GPT-4, seamlessly integrated into your chat window.
In this post, we’ll provide you with the essential method to effortlessly navigate and use the dynamic features of the Image Editor ChatGPT plugin.
Table of Contents
What Is An Image Editor ChatGPT Plugin?
The Image Editor ChatGPT plugin is a versatile tool that allows users to edit images directly in the chat interface. It offers various functions, including:
- Cropping, resizing, and rotating your image as per your needs.
- Applying different types of filters in images.
- Adjusting brightness, contrast, and saturation.
Users can easily add text and draw and remove image backgrounds effortlessly.
The image editor plugin is designed for user-friendliness, and it ensures a great experience, eliminating the need for advanced image editing skills.
It provides a seamless way for users to enhance and modify images without the complexity often associated with traditional editing tools.
How Do You Enable And Install The Image Editor Plugin?
Get started with ChatGPT’s Image Editor plugin by following these easy steps:
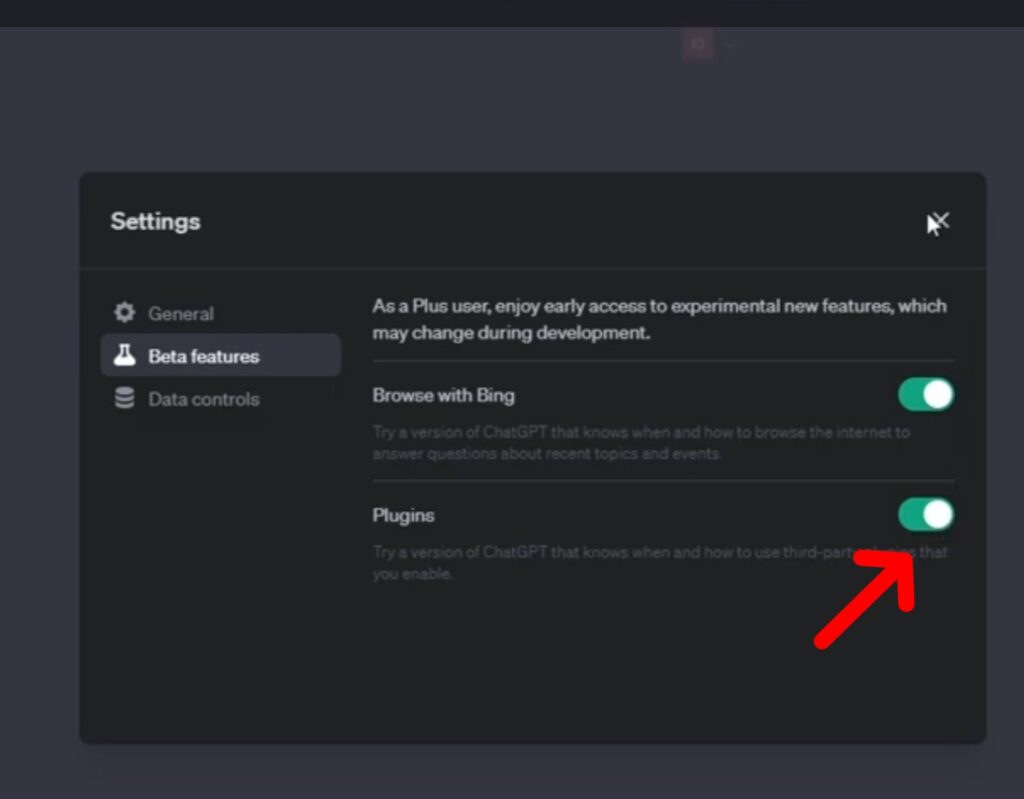
Step 1: Head over to chat.openai.com and make sure you’re using GPT-4. Activate the plugins feature, available for ChatGPT Plus subscribers, on the settings page if you haven’t already.
Step 2: Explore the ChatGPT plugin store by clicking on the plugins icon.
Step 3: In the store, search for the “Image Editor” plugin, install it, and activate it in your list of installed plugins.
Step 4: Exercise caution when enabling other plugins to avoid conflicts with the Image Editor and ensure a seamless editing experience.
That’s all. You’re now ready to unleash the potential of the Image Editor plugin on ChatGPT.
Read Also: How To Get Canva Pro For Free In 2024
How Do You Use The Image Editor ChatGPT Plugin?
Once you’ve successfully installed and activated the Image Editor plugin, you can begin editing.
If your image is locally stored, upload it to a cloud storage platform like Google Drive and share the URL. Copy the shared image URL and paste it into the ChatGPT dialogue box. Give ChatGPT a moment to retrieve the image information and display it.
While using the Image Editor plugin, you might encounter a few challenges. Here are some tips for a smooth editing experience:
Tip 1: Check the plugin status: Confirm that the plugin is correctly installed and enabled. Occasionally, it may be disabled or improperly installed, causing issues.
Tip 2. Use the correct URL format: When pasting the URL into the Image Editor plugin, ensure it starts with ‘http://’ or ‘https://’. Also, verify that the URL is valid and accessible.
Tip 3. Supported file formats: The Image Editor plugin accommodates various file formats, including PNG. Always confirm that the image file format is compatible with the plugin.
Tip 4. Patience with bulk operations: If processing multiple images simultaneously, it may take some time. Avoid making numerous requests in a short period to prevent system overload.
That’s all. These tips help you use potential issues and enjoy uninterrupted image editing with the Image Editor ChatGPT plugin.
How To Enhance The Image Editor ChatGPT Plugin?
Explore the Image Editor plugin, which is equipped with a range of features to enhance your image editing experience.
Here are command suggestions to optimize your use of the image editor plugin.
1. Web Optimization:
Enhance your images for web sharing by using “Resize image to 1200×630.” This quick command ensures faster load times and an improved user experience on social media platforms.
2. Precise Cropping:
Focus on your main subject with the “Crop the image” command, eliminating unnecessary background elements. Ideal for product images or profile pictures.
3. Thumbnail Creation:
Easily resize and crop images for various purposes with “Create thumbnail.” Perfect for video previews, gallery images, or icons.
4. Blur Sensitive Details:
Safeguard sensitive information by using the “Blur feature” to obscure details like faces, license plates, or text in an image.
5. Bulk Editing Automation:
Streamline your workflow by automating bulk edits. Send multiple requests to the Image Editor plugin for consistent edits across various images.
That’s all. Once satisfied, open the edited image in a new tab and download it. Explore these commands and more to make the most of the Image Editor plugin’s capabilities with ChatGPT.
Read Also: How To Use Zapier ChatGPT Plugin
Is It Possible To Uninstall The Image Editor ChatGPT Plugin?
Yes, you can uninstall it. To remove the Image Editor ChatGPT Plugin, follow these steps:
Step 1: Launch and log in to ChatGPT, then choose the GPT-4 model.

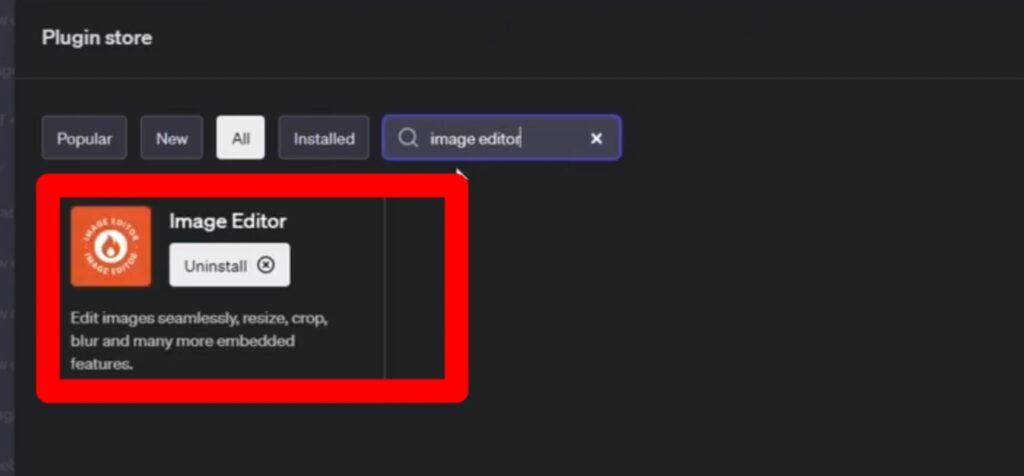
Step 2: Click on the ChatGPT plugin icon, navigate to the Plugin store, and locate the Image Editor ChatGPT Plugin.
Step 3: Once found, select ‘Uninstall’ to remove the plugin.
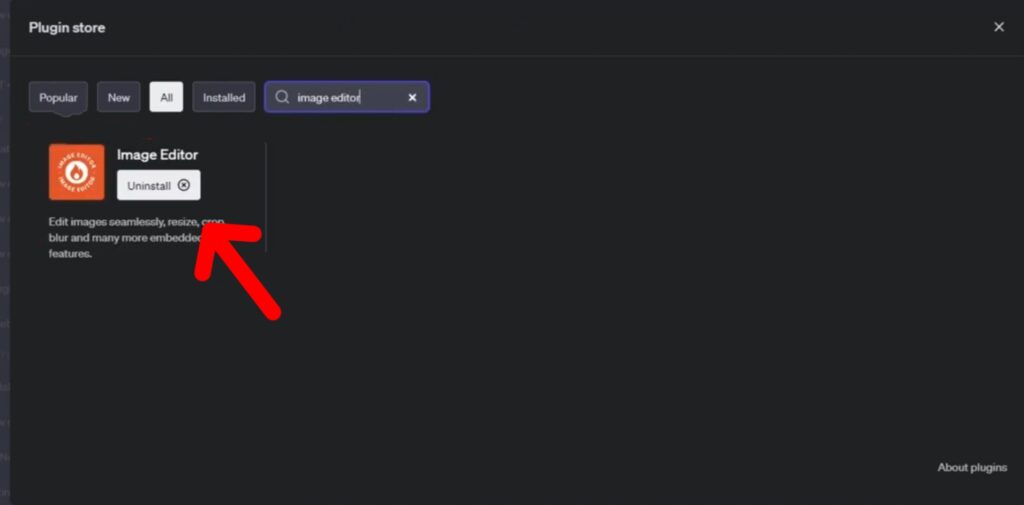
That’s it. This process ensures you can easily uninstall the Image Editor ChatGPT Plugin if you decide it’s no longer needed, which provides you with a streamlined approach to managing your ChatGPT experience.
Conclusion
Through this article, we have told you the procedure on how to use the image editor chatgpt plugin. We’ve taught you everything from how to enable and install the plugin to some of the best tips for using it. We hope you found this article helpful. For more such articles, follow us below.